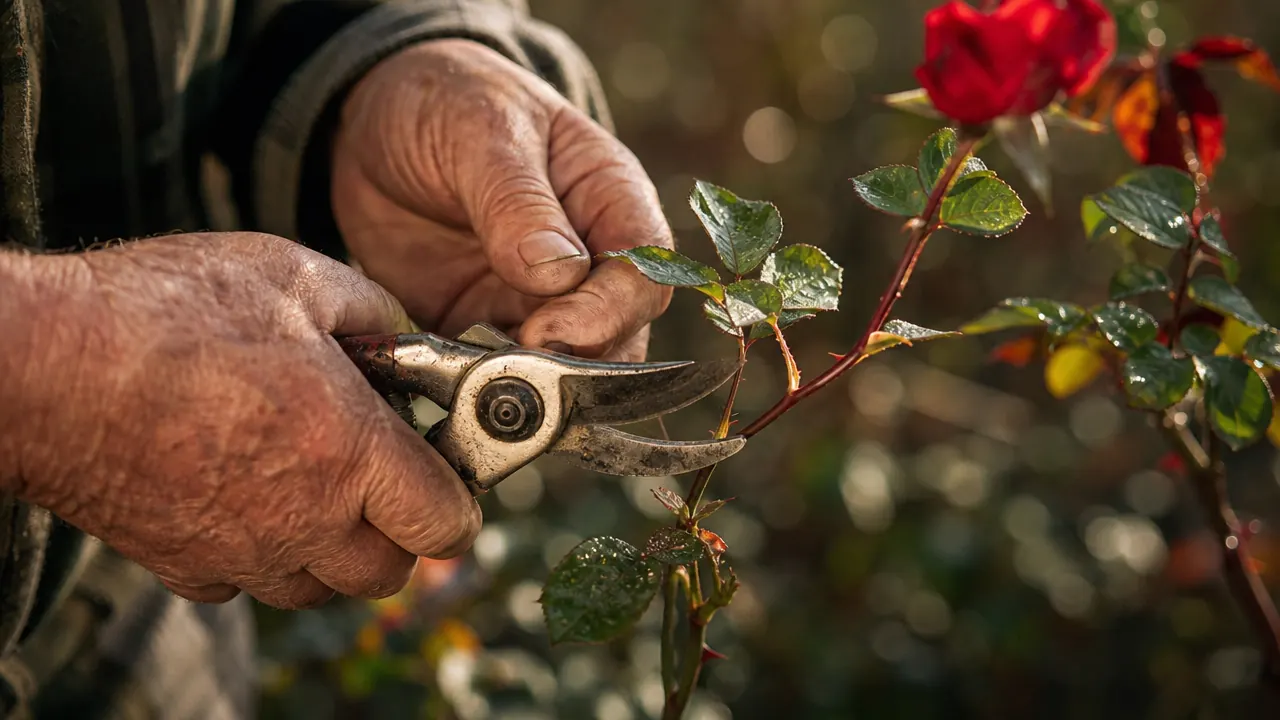
Most rose problems I have seen over the years do not start with disease or bad soil. They start with a bad pruning cut made the previous season. A crushed cane from an anvil pruner. A ragged tear from a blade that needed sharpening six months ago. A cut angled the wrong direction so water pools right over the bud. The rose spends its energy fighting infection instead of pushing new growth, and by midsummer you are wondering why it looks half-dead when the neighbor's identical variety is covered in blooms.
Clean pruning is not complicated, but it does require the right tool and a clear picture of where and how to cut. I have been growing roses in a Zone 7 yard for eleven years, including two climbing hybrid teas along a cedar fence and a bed of seven floribundas my wife planted when we moved in. What I use now is a Felco F5 bypass pruner, and the results since switching from a cheap hardware-store pair are not subtle. The canes I cut with it callus over in days, not weeks. That is what this guide is about: giving you the technique that maximizes that result.
Your pruner is either helping your roses heal or slowing them down.
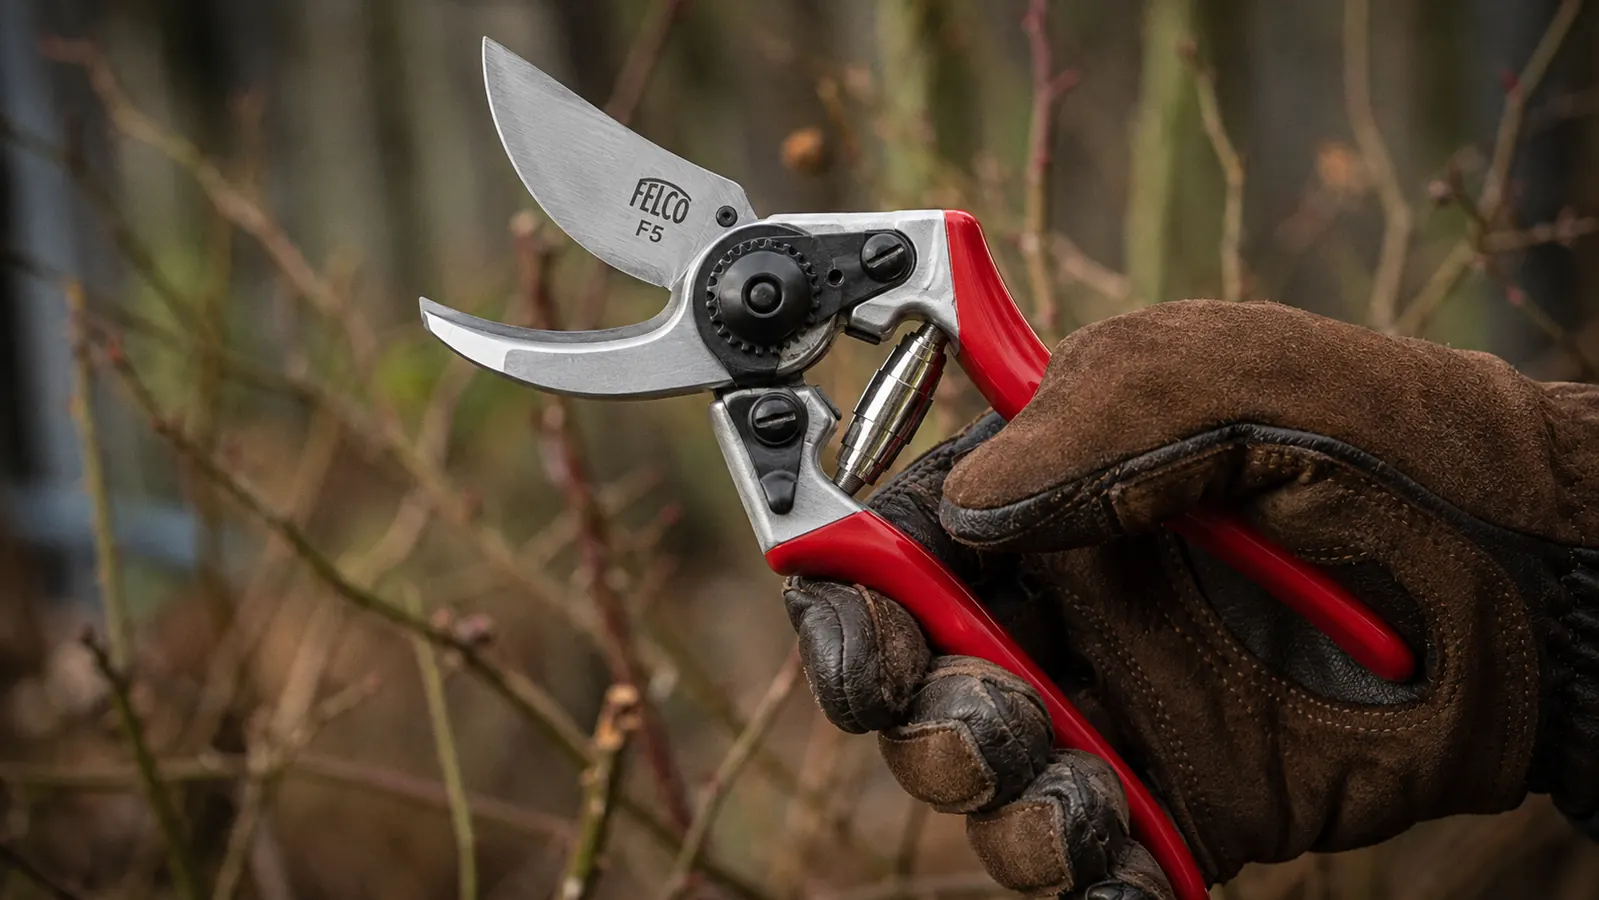
The Felco F5 is the bypass pruner that serious rose growers come back to. Hardened steel blade, replaceable parts, Swiss-made tolerances that stay sharp through a full season.
Amazon Check Today's Price on Amazon →Step 1: Time Your Pruning Right
For most of the United States, the right time to do your main annual pruning is late winter, just as forsythia starts blooming in your area. In Zone 6 and 7 that typically falls in late February through mid-March. In Zone 8 and warmer it can be as early as January. The trigger is not a date on the calendar, it is the forsythia. When you see yellow on those shrubs, your roses are ready. The canes are still dormant but the plant is building pressure below the soil, and that upward push helps the cut callus quickly.
Avoid pruning in a hard frost. Frozen canes shatter instead of cutting cleanly, and an open wound at 28 degrees heals poorly. If a late freeze is coming after you have already pruned, do not panic. The callus is tougher than you think. Just avoid making fresh cuts the day before a hard freeze if you can help it. Deadheading and light shaping during the growing season can happen any time, but save the heavy structural cuts for that dormant window.
Step 2: Prepare Your Tools Before You Touch a Single Cane
Dull blades and dirty blades cause two different problems. A dull blade crushes the cane's vascular tissue as it cuts, which leads to the brown interior you sometimes see on a freshly cut rose stem. A dirty blade that has not been wiped between plants spreads botrytis, black spot spores, and crown gall bacteria from one rose to the next. Both are preventable with two minutes of prep.
Before you start: wipe the blade with a rag soaked in rubbing alcohol or a 10 percent bleach solution. If you are moving between rose plants, wipe again between each one. This sounds overly cautious until the year you spread crown gall through an entire bed because you skipped it. Sharpen the blade if it is not gliding cleanly. The Felco F5 uses a blade you can sharpen in the field with a ceramic whetstone in about thirty seconds per side. That is one of the real practical advantages of a pruner with quality hardened steel.
Put on leather gloves with at least wrist coverage. Most rose injuries come from the hand not holding the pruner. If you are working with climbing roses or anything with particularly aggressive thorns, gauntlet-length gloves that cover the forearm are worth it.
Step 3: Remove Dead, Damaged, and Crossing Canes First
Before you make a single shaping cut, clear out the obvious problems. Dead canes are brown or gray all the way through, shriveled, and often have bark that peels or crumbles. Cut them back to the base or to the bud union, whichever is cleanest. If a cane is alive at the base but dead partway up, cut until you see healthy white or light green pith in the center. Brown pith means dead tissue; keep cutting until the interior is clean.
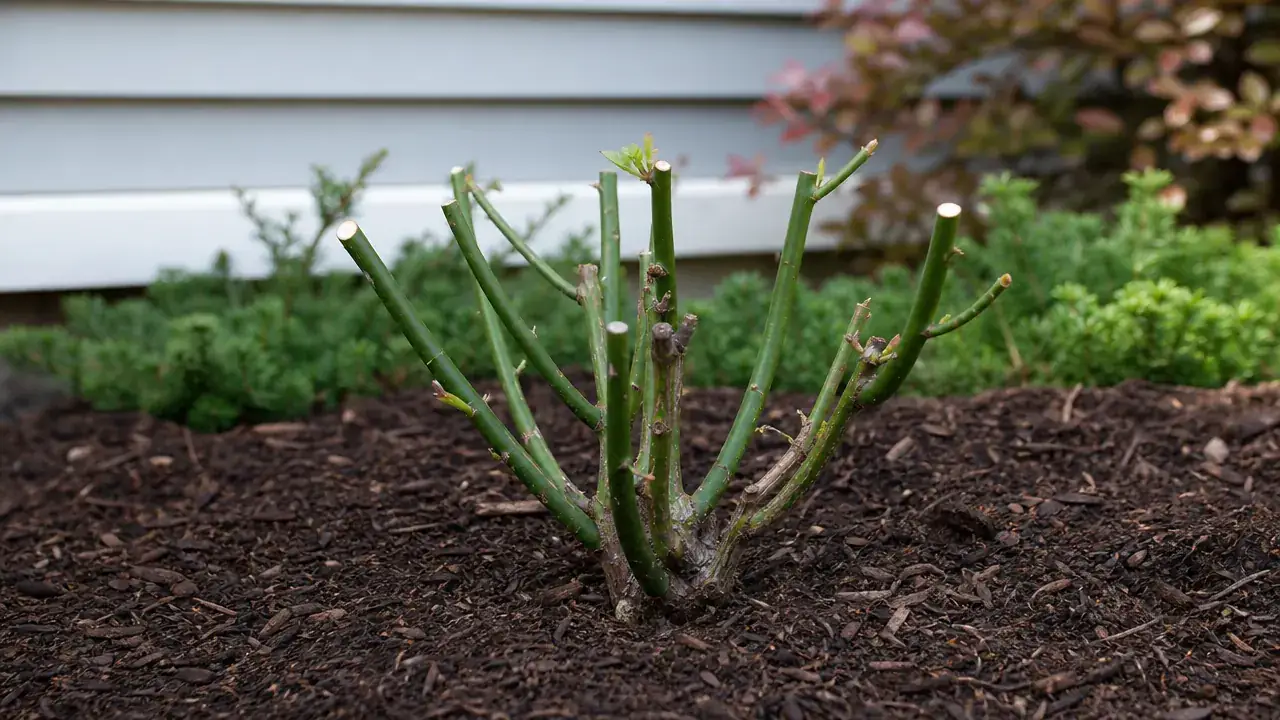
Next, remove any canes thinner than a pencil. They will not produce strong blooms, and they crowd the center of the plant. Then look for canes that are crossing or rubbing against each other. Where two canes rub, you get a wound that never heals. Remove the weaker of the two, always cutting back to an outward-facing bud or to the bud union if the whole cane needs to go.
After this pass, most hybrid tea roses should have four to six strong canes remaining. Floribundas and shrub roses can keep more, but the goal is always an open vase shape with good airflow to the center. Dense, tangled centers hold moisture and invite fungal problems. Open centers dry out faster and get better sun penetration.
Brown pith means you are still in dead tissue. Keep cutting, in quarter-inch increments if needed, until the center of the cane is white or pale green.
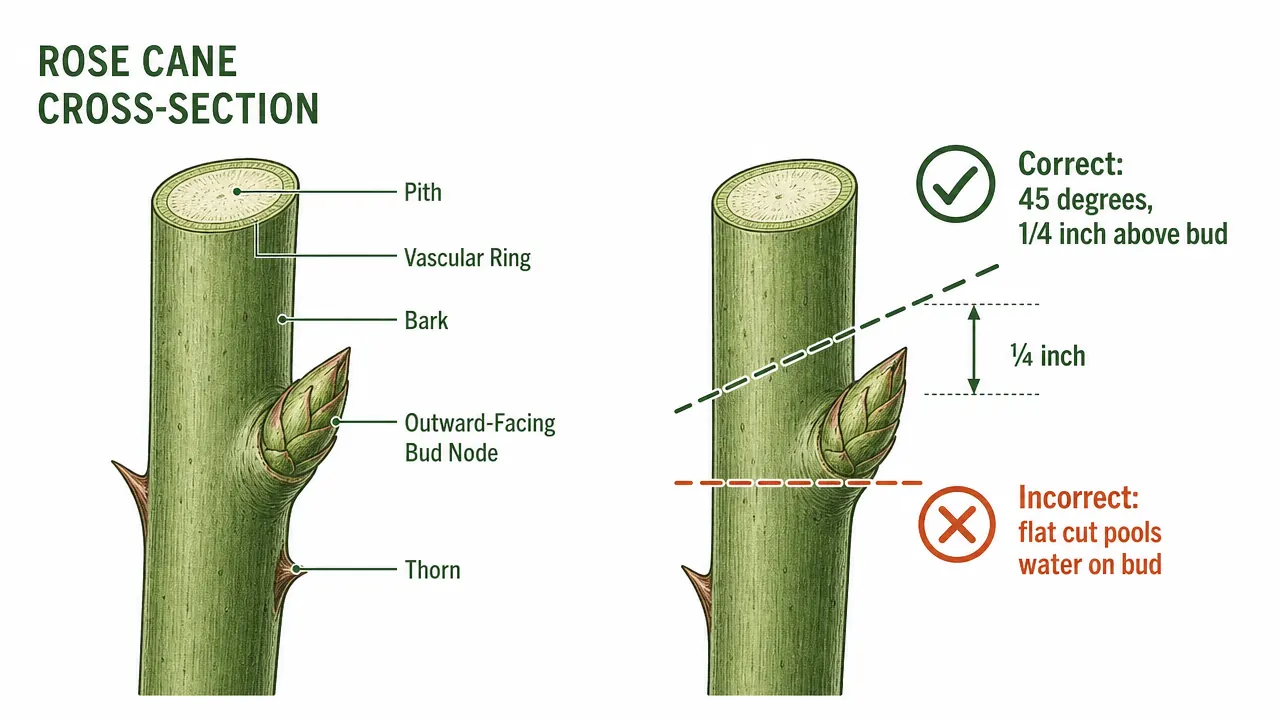
Step 4: Make the Final Shaping Cuts at the Right Angle and Height
This is where most pruning mistakes happen. The goal is a cut made about a quarter inch above an outward-facing bud, angled at roughly 45 degrees, with the low side of the angle away from the bud. That slope lets water run off rather than pooling right over the bud eye, which can rot the bud before it breaks.
Position the bypass pruner so the cutting blade, the sharp side, faces down toward the bud and the counter blade, the curved hooked side, faces the portion of cane you are removing. This matters. If you reverse it and cut with the counter blade facing the bud, you get a slightly crushed cut on the bud side. The Felco F5 has a sap groove on the counter blade that helps push cut material away from the cutting edge, which keeps the cut face cleaner than a simple flat counter blade design.
Apply steady pressure in one smooth motion. Do not rock the blade or use multiple partial squeezes on a cane that is too thick. If you are working hard to close the pruner, either the cane is too large for the tool, which means you need a lopper, or the blade needs sharpening. The Felco F5 is rated for stems up to three-quarters of an inch in diameter. Anything thicker than that should go to a bypass lopper. Forcing a pruner on oversized wood crushes the cut face and stresses the pivot, eventually bending the blade and ruining the tolerance you paid for.
Step 5: Apply a Cut Sealant and Clean Up Debris
There is real debate among rose growers about whether cut sealants are necessary. In dry climates, many experienced growers skip them entirely with no problems. In humid climates where botrytis is a constant presence, particularly in the Southeast and Pacific Northwest, a light application of a rose pruning sealant like Tanglefoot or a similar product on each cut surface provides a meaningful barrier against fungal entry while the callus forms. If you are uncertain, apply it. It does not hurt, and on high-value plants it is cheap insurance.
After pruning, rake up and bag all the clippings from around the base of the plant. Do not compost them. Rose cuttings are a reservoir for black spot spores, and even a hot compost pile does not reliably kill them. Bag and trash them. Then clean the base of any fallen leaves from the previous season and apply a fresh layer of mulch, two to three inches deep, keeping it an inch or two away from the canes themselves to prevent crown rot.
What Else Helps Your Roses Come Back Strong
Pruning technique matters, but it works alongside a few other practices that most gardeners either overlook or skip because they seem minor. They are not. The combination of good cuts plus these supporting habits is what separates a rose bed that performs reliably for decades from one that needs constant babying.
Feed with a balanced rose fertilizer about two to four weeks after pruning, once the new growth is two to three inches long. Feeding too early, right at pruning time, pushes tender growth that a late frost can damage. Timing it to visible new growth means the plant is already pulling resources upward and the fertilizer supports momentum rather than forcing it.
Spray preventatively for fungal disease before the first signs appear, not after. By the time you see black spot, it has been in the soil for weeks. A copper-based fungicide or a bicarbonate spray applied every seven to ten days through the wet spring months keeps the load low enough that the plant's own defenses handle the rest. Once black spot is active on the foliage, you are managing it, not eliminating it, for the rest of the season.
On the tool side, if you are still cutting with a hardware-store pruner that came in a blister pack for twelve dollars, you are making every one of these pruning steps harder than it needs to be. A sharp, well-fitted bypass pruner does not just make faster cuts. It makes cuts that close cleanly, that do not need to be remade because the first pass tore instead of sliced, and that put less stress on your hand over a session that might involve cutting forty to sixty canes. The Felco F5 is the one I reach for every time. I have a full review of what two seasons of daily use looks like at the felco-f5-review-long-term article, and a side-by-side comparison with the Fiskars bypass pruner at felco-f5-vs-fiskars-pruner if you are deciding between the two.
A sharp bypass pruner is the single biggest upgrade you can make to your rose pruning results.
The Felco F5 has replaceable blades, a Swiss-made spring that holds tension for years, and a hardened steel edge that stays sharp through a full growing season of regular use.
Amazon Check Today's Price on Amazon →